November 13, 2013
-
Tricks for installing laminate flooring
This has been the most challenging laminate floor I’ve installed, with several tricky parts, but so far I’ve been successful in figuring out how to deal with them. One of the very first challenges was the bracket holding this cedar column to the floor.

I cut a piece of flooring to fit around the column, cut a notch on the edge for the upright part of the bracket, and hollowed underneath for the horizontal part by dragging the piece crosswise under the miter saw.

It worked pretty well, as you can see here. The wood lies flat on the floor and fits snugly to the column. Note that by having the finish edge of the right end flush with the column, I can go on from there with a whole piece. I could have notched the middle of a whole piece to go around the column, but it would have been trickier dealing with the bracket and the narrow strip would be very fragile.

Doorways pose other problems. The first thing to do is cut off the bottom of the trim on each side with a flush cut saw, after flipping over a piece of flooring to use as a spacer.

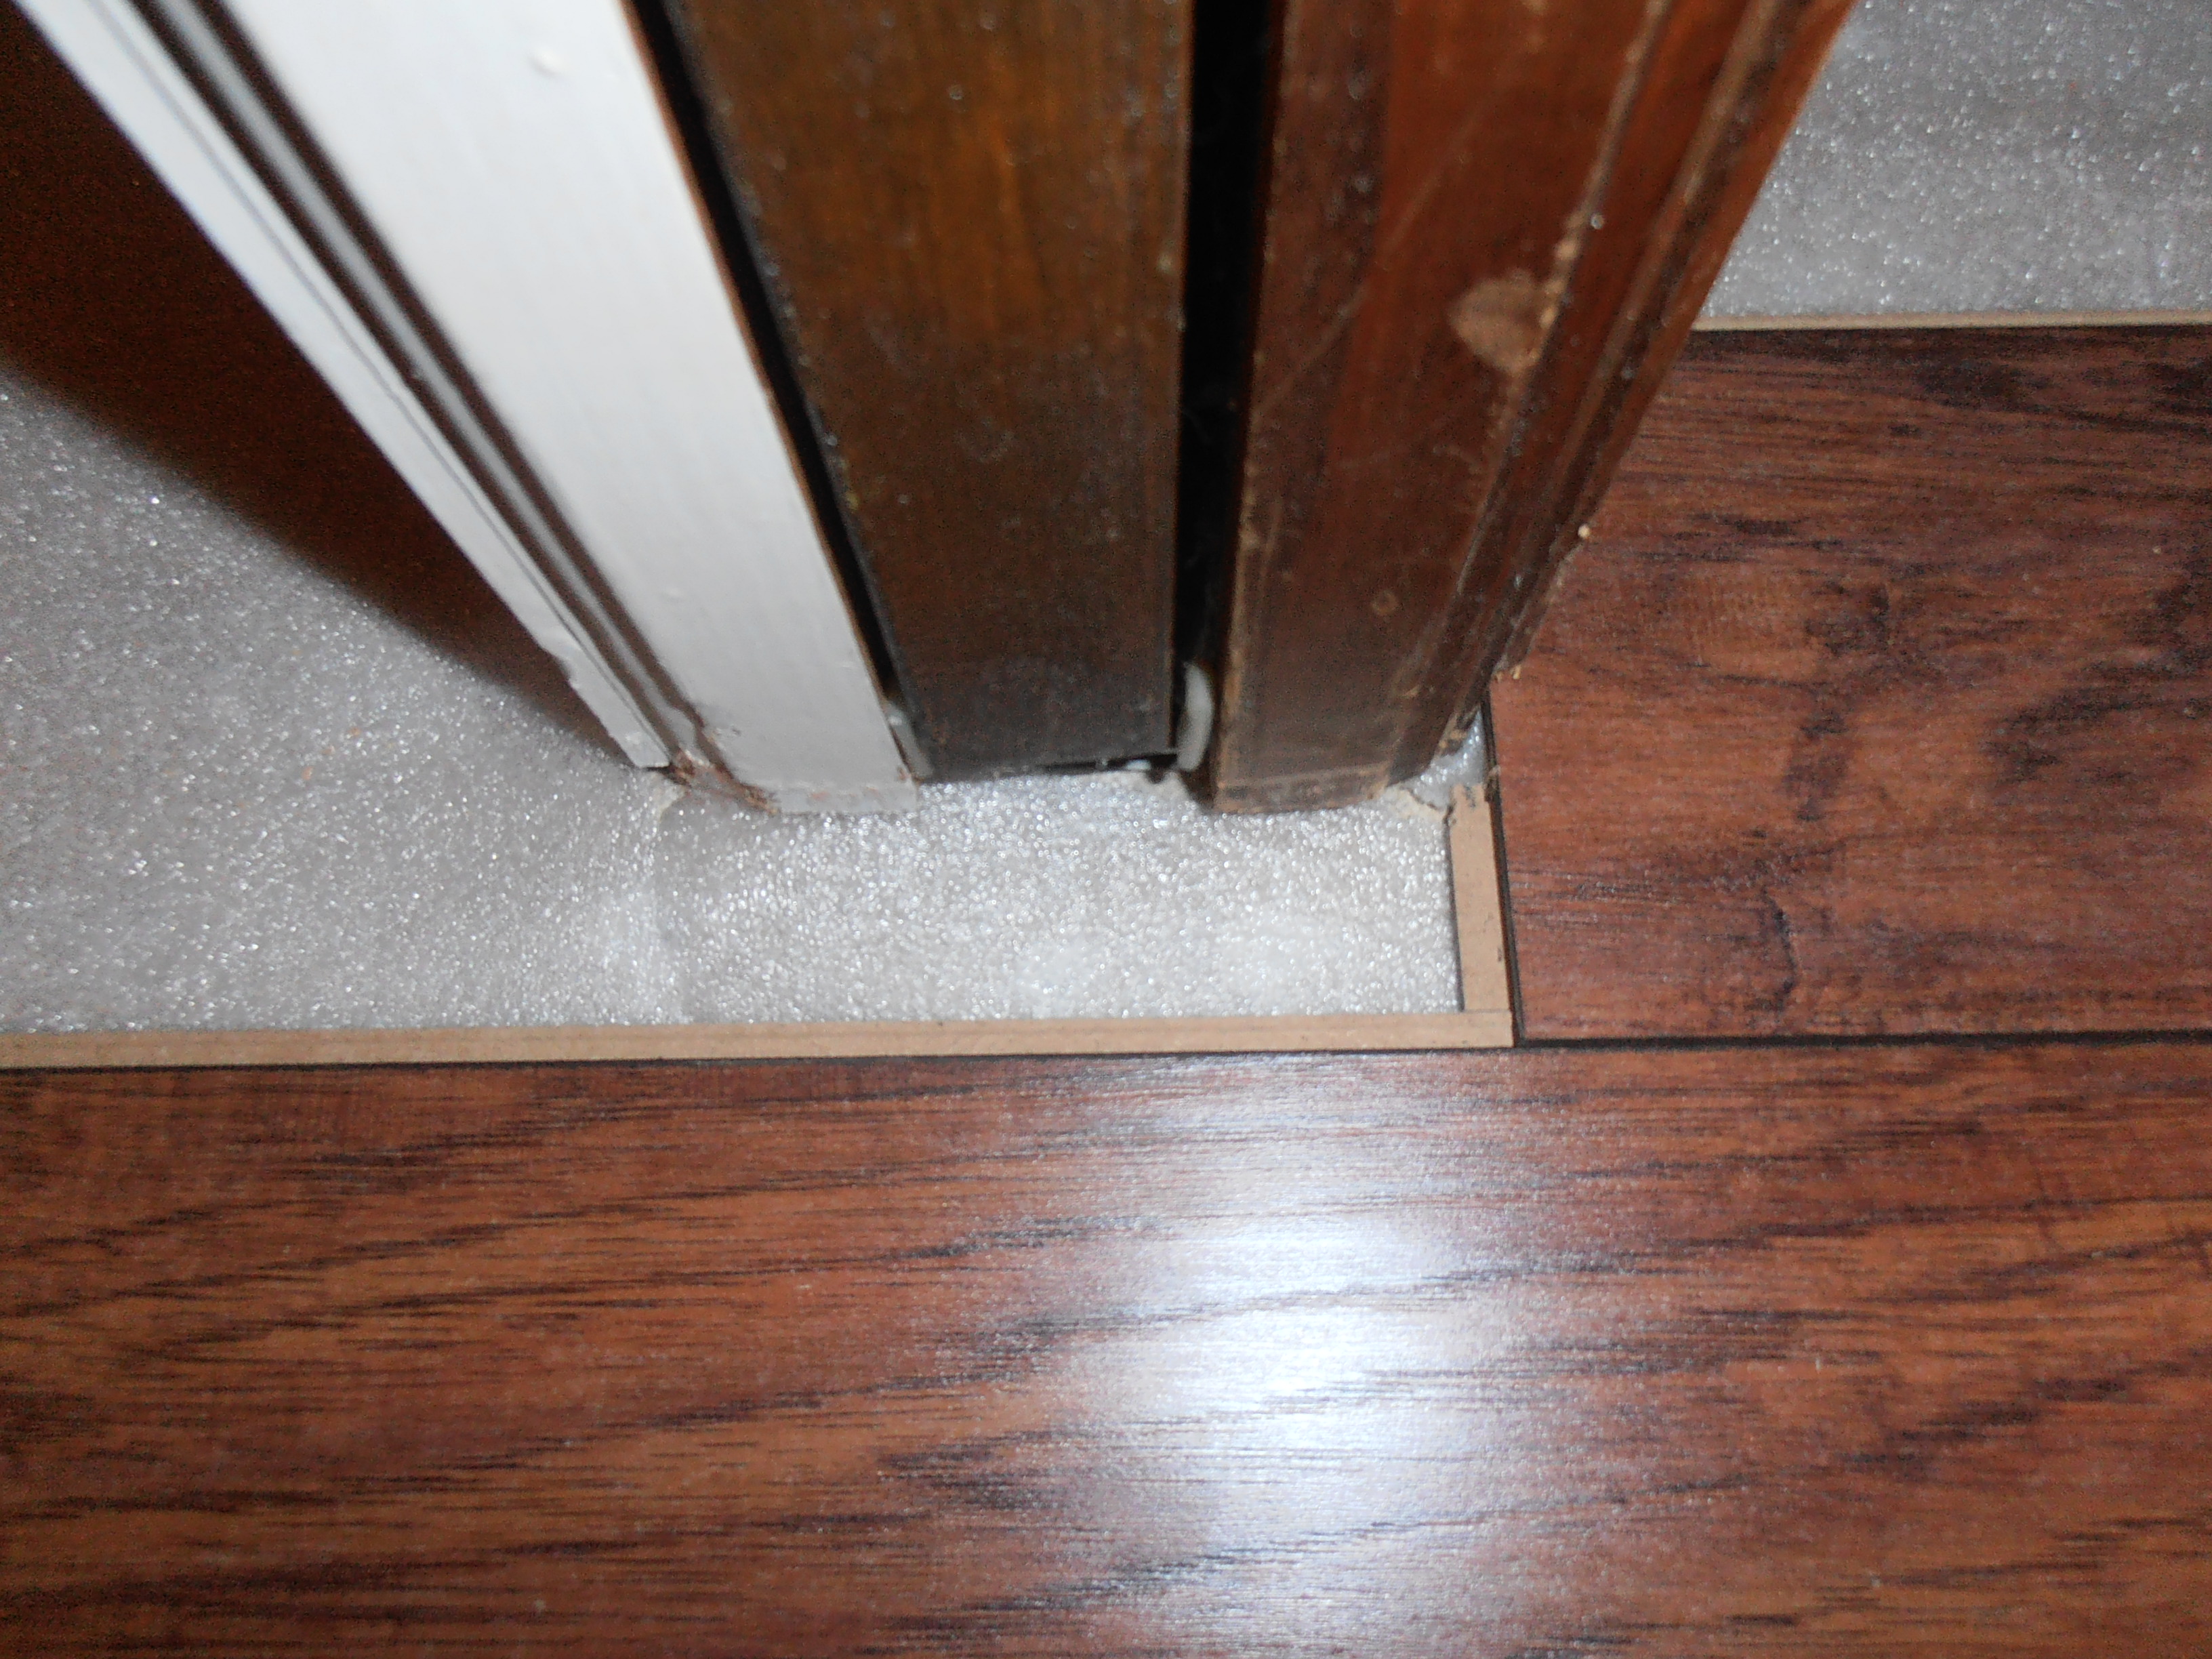
On the other side of this double pocket-door, I notched around the wall. Here it’s not as easy to do that, because there isn’t room to back in the snap-lock connection. So I used the same strategy as with the column and brought one piece up flush to the edge of the door (on the right). I trimmed off most of the interlocking lip and left enough to slide into the space between the door and the flooring. I also shaved the raised bead off the lip because we won’t be able to interlock here, just overlap.
 I cut an L-shaped piece that will slide under the casing and connect with the piece on the right. I also ran glue along the lip on the right so that the two pieces will have a permanent connection. To tap the piece into position, I created a tapping block from a scrap of flooring. It has a male edge so that it will interlock with the female edge instead of damaging it.
Whoops… my cut is too short! Gotta tap the piece back out and run to the saw again.

There we go. That’s close enough. There are a couple of flaws in the finish where it chipped, but I’ll drip a little wood stain on them and no one will notice.
 By the other end column, we have this doorway and threshold to deal with. As you can see, I used the same strategy with the column, cutting a piece to come out flush. It would look classier not to have two cut edges together, but most people won’t notice that.
To deal with the doorway, I cut another L-shaped piece to tap under the casing. I made it just narrower than the door, so I could interlock it and then slide it up to the column.

The threshold is curved, so I made the cut beveled to match. Most circular saws and table saws have an angle adjustment. I used my circular saw because my table saw is hard to adjust.

It came out as close to perfect as you could want. Man, I love being my age! I have skills!


On the left side of the doorway, we have a similar problem, but we can’t slide the piece in from the left because it gets wider at the doorway. So I decided to try sliding the piece straight in and working it back to see if I can get it to interlock.

It slid in easily enough. The size is perfect. (Man, I’m good!)

To pry it back into its notch, I used a prybar. The left side went in easily.

The right side was trickier; remember that beveled edge? Yeah. But I pulled and tapped on the prybar and sort of got the edges to interlock.

In the middle, the floor had slipped under the Sheetrock, so I used a narrow chisel to grip the edge and lever it back.

Good enough. You can see that the seam hasn’t closed completely; there’s a line of yellow where it should be all black. But I don’t think it’s likely to separate, wedged in as it is. I may go back to it and see if I can get it tighter when I do the baseboards.

Another big challenge will be this little semicircle on the bottom step. Cutting the flooring around it won’t be that tough, but when I put flooring on the staircase, I’ll have to get really creative.

When I pulled the carpet off, the padding made it look like one of those weird pulled taffy candies.

The edges are lined with tack strips. I hate those things! They always stab me when I’m working with them. I pried them off with a chisel.
Somehow I need to figure out how to cover this thing with laminate flooring and tile. When I do, I’ll post about it.


Comments (6)
You are GOOD! Wow. I’m glad that when my husband did our laminate floor it was all easy, level and no weird corners/edges… My solution for most things like the curve at the bottom of the stairs is to simplify. Why not just cut it off? Make a flat squared end?
glad it’s you and not me. LOL
we have a sunken living room and it was something for the fellows to do the step-I even told them just leave it cause it didn’t have anywhere and it’s the exact same color but I think he felt like it was a challenge. LOL he did a good job
I wonder if you can do the stair bottom like you would bend sheetrock? Score the back of the flooring and maybe it will bend like you want…speaking of wants… I want one of those pull saw things! You are Good!!!
Lookin’ beautiful,Tim! You do such great work!
Will you make the circle-thingee a square-thingee in order to cover it?
HUGS!!!
PS…please forgive my use of such technical terms!
Seems 2 ladies here had similar thoughts to my own (I love the way adamswomanback said it) about chopping off the extra jutting out rounded bump.
All I can say is WOW! just think how much of mulla you saved.